We recommend our customers to enable a token based authentication instead of OAuth’s email + password based authentication. Primarily, NetSuite’s password expire every six months, which requires re-authentication. In addition to convenience, email + password authentication is much less secure in comparison.
Please follow the instructions below to setup a token based authentication with Leapfin. Please note that there are two pairs of keys that will only appear once during this process, so please capture them immediately:
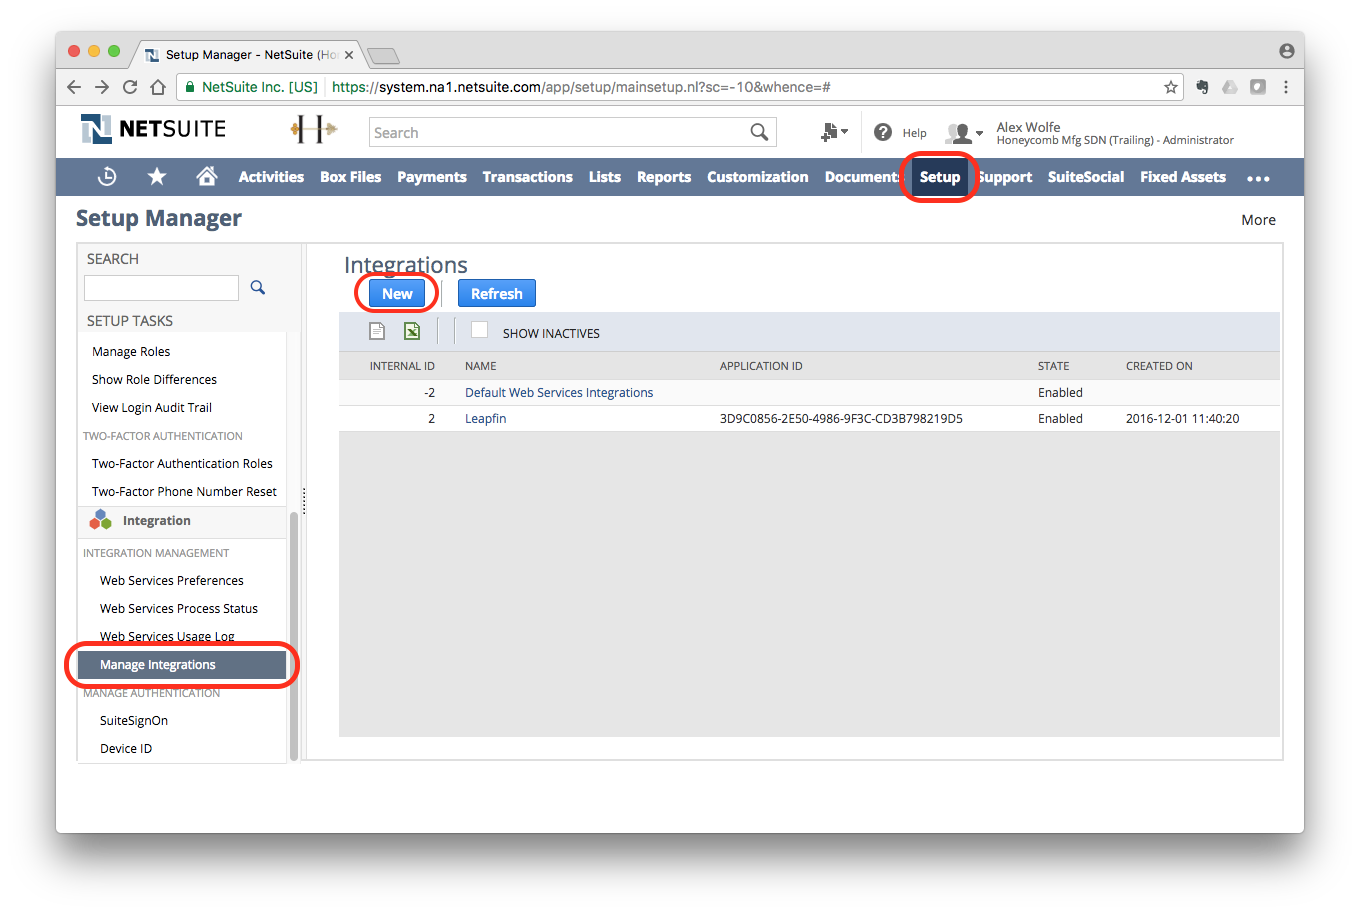
Step 1: Create a Integration Record
- Click on Setup on the top navigation bar
- Click on Integration on the left hand navigation, and select Manage Integrations
- Click New to set up a new integration record
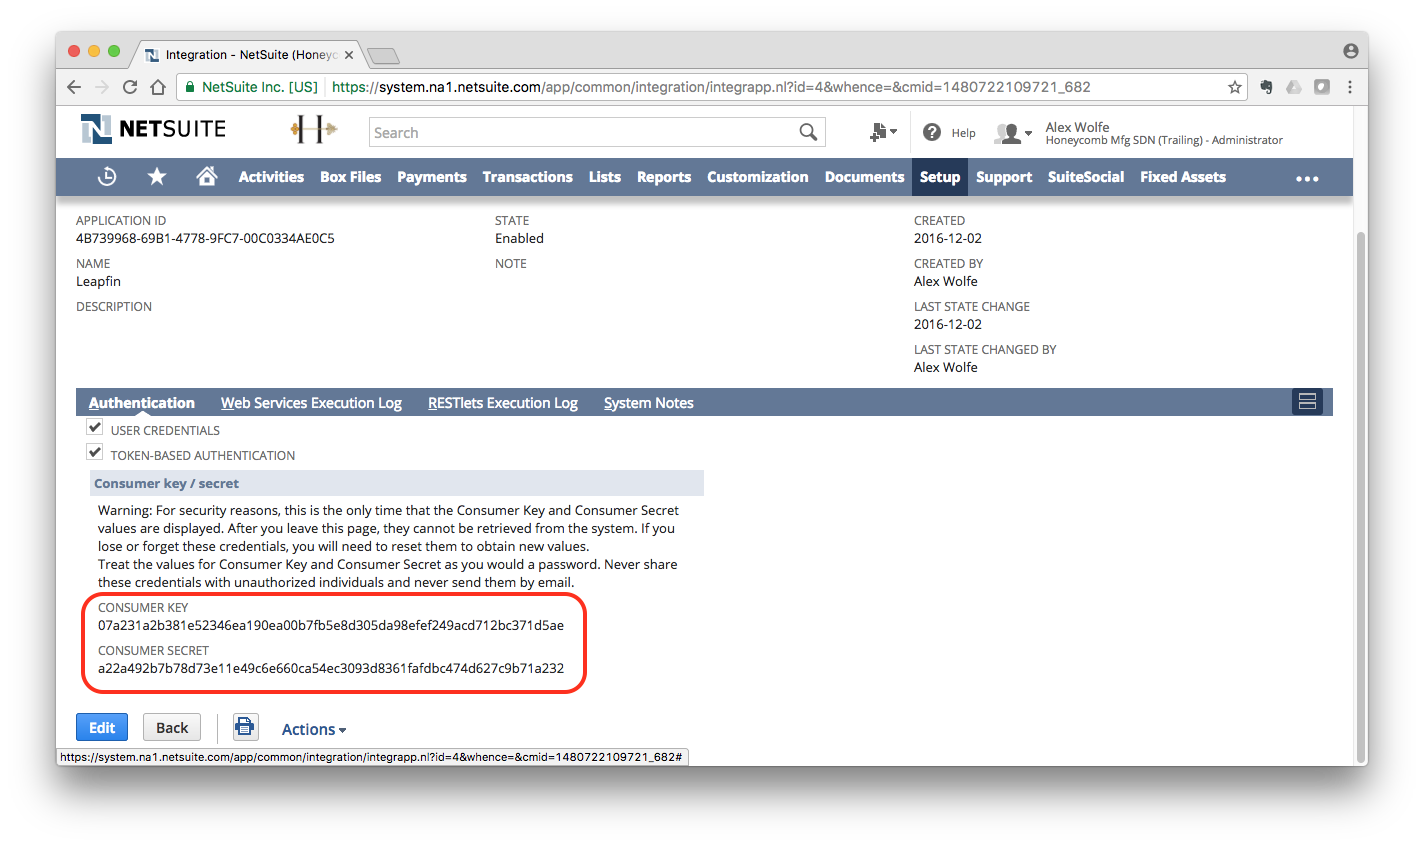
- Enter “Leapfin” under Name for the integration
- Ensure the State of the integration is set to Enabled
- Under Authentication, check “Token-Based Authentication”
- Click Save
- Capture the Consumer Key and Consumer Secret immediately. They only appear once!

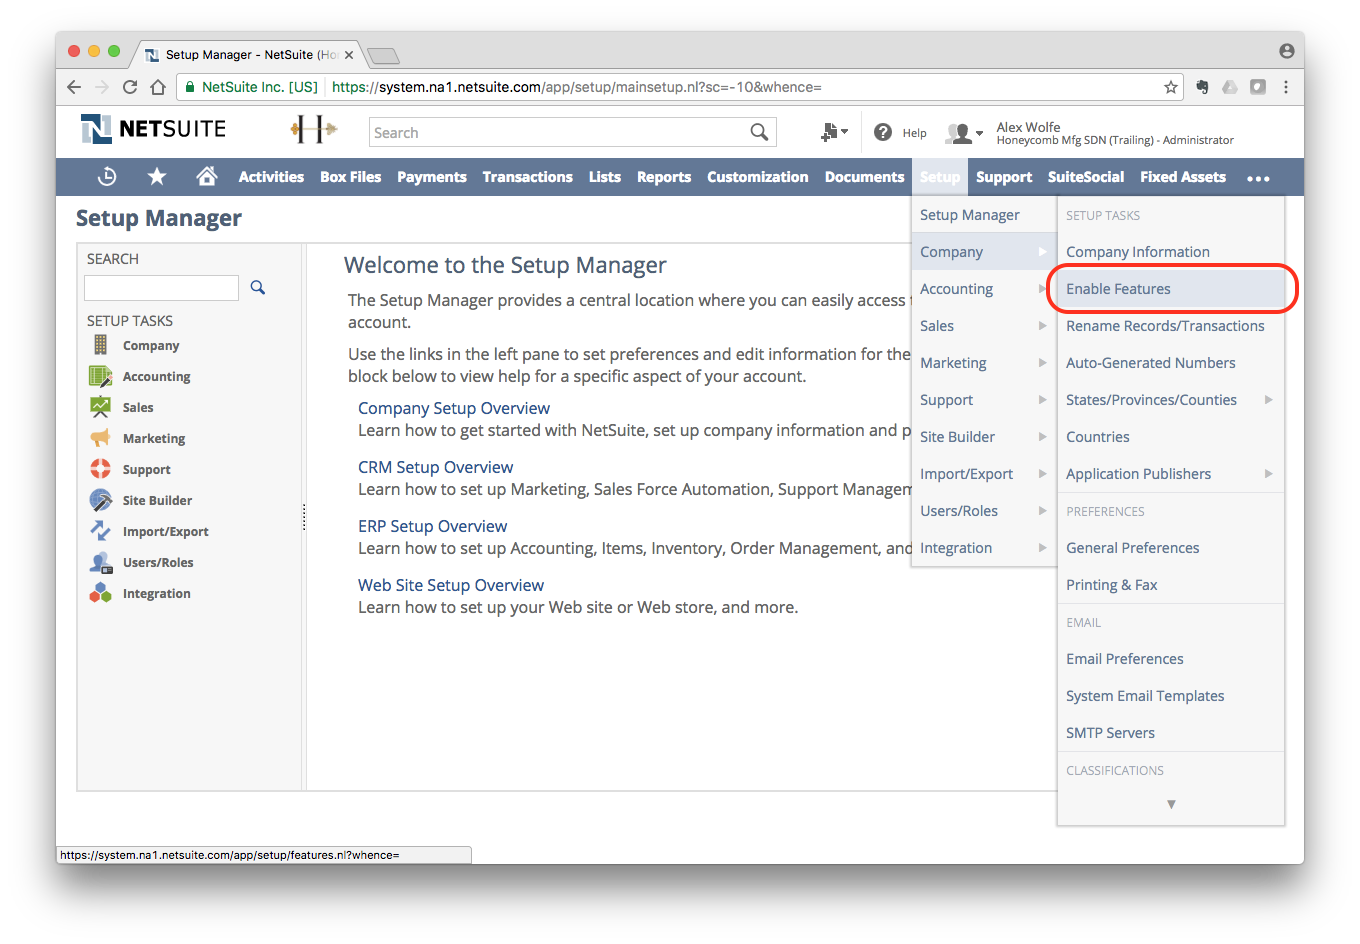
Step 2: Enable Token Based Authentication
- Click on Setup on the top navigation bar
- Under Setup, navigate to Company > Setup Tasks > Enable Features > SuiteCloud > Manage Authentication
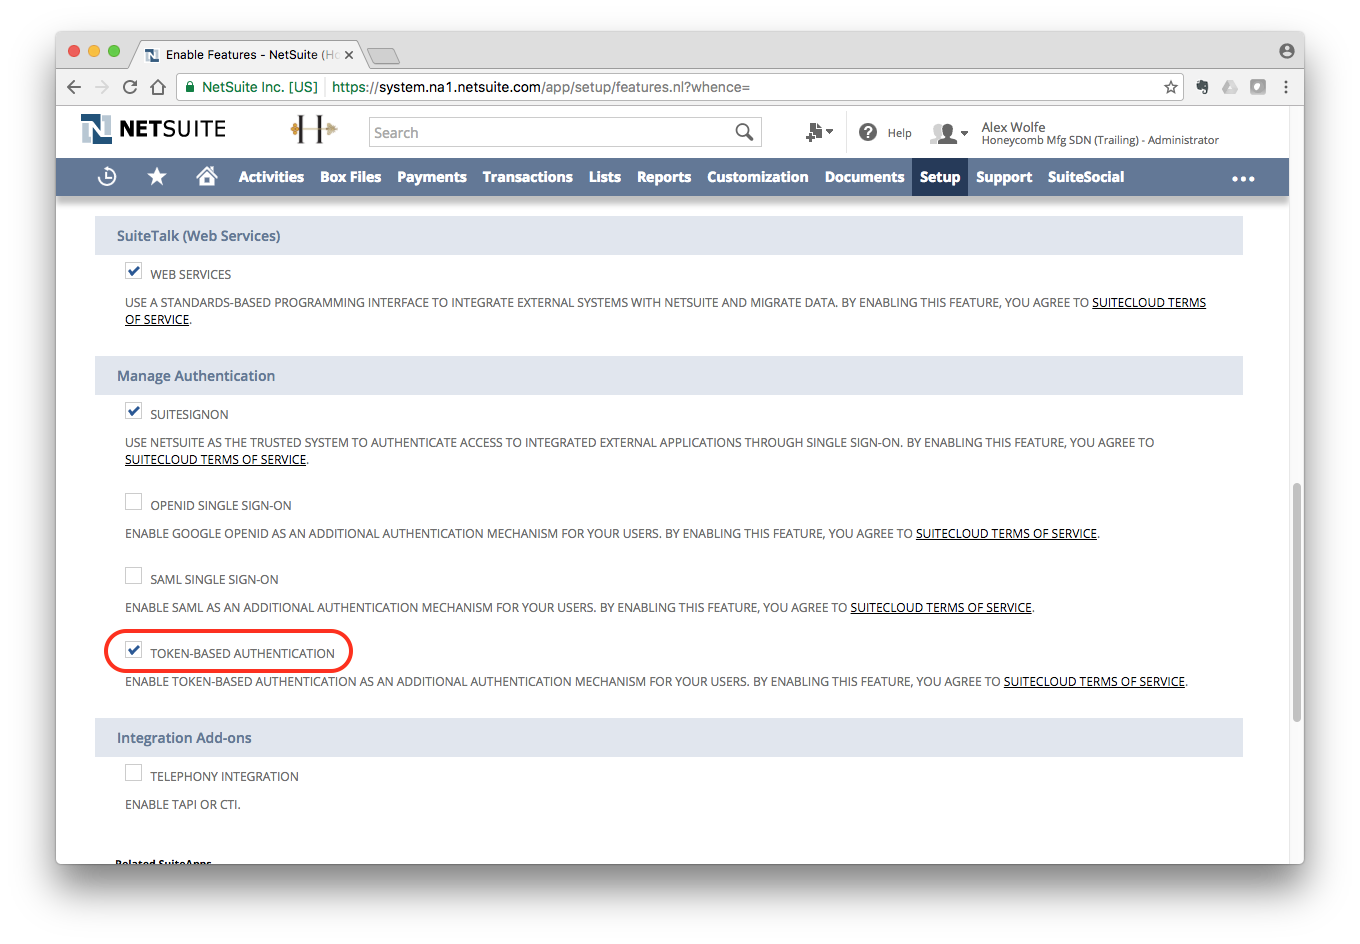
- Make sure Token Based Authentication is checked and enabled.
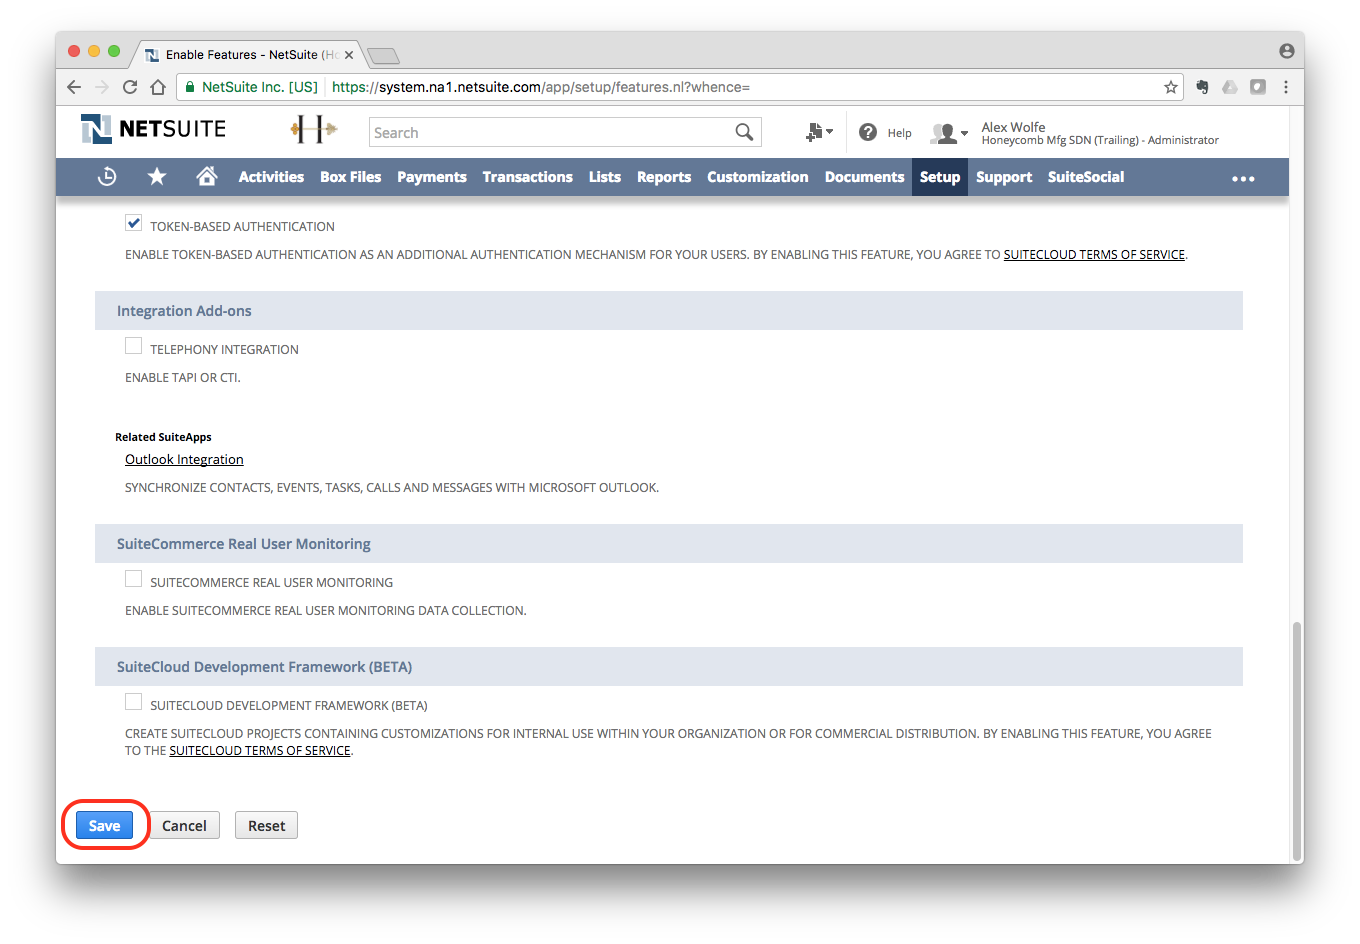
- Scroll down and make sure you Save the new setting.
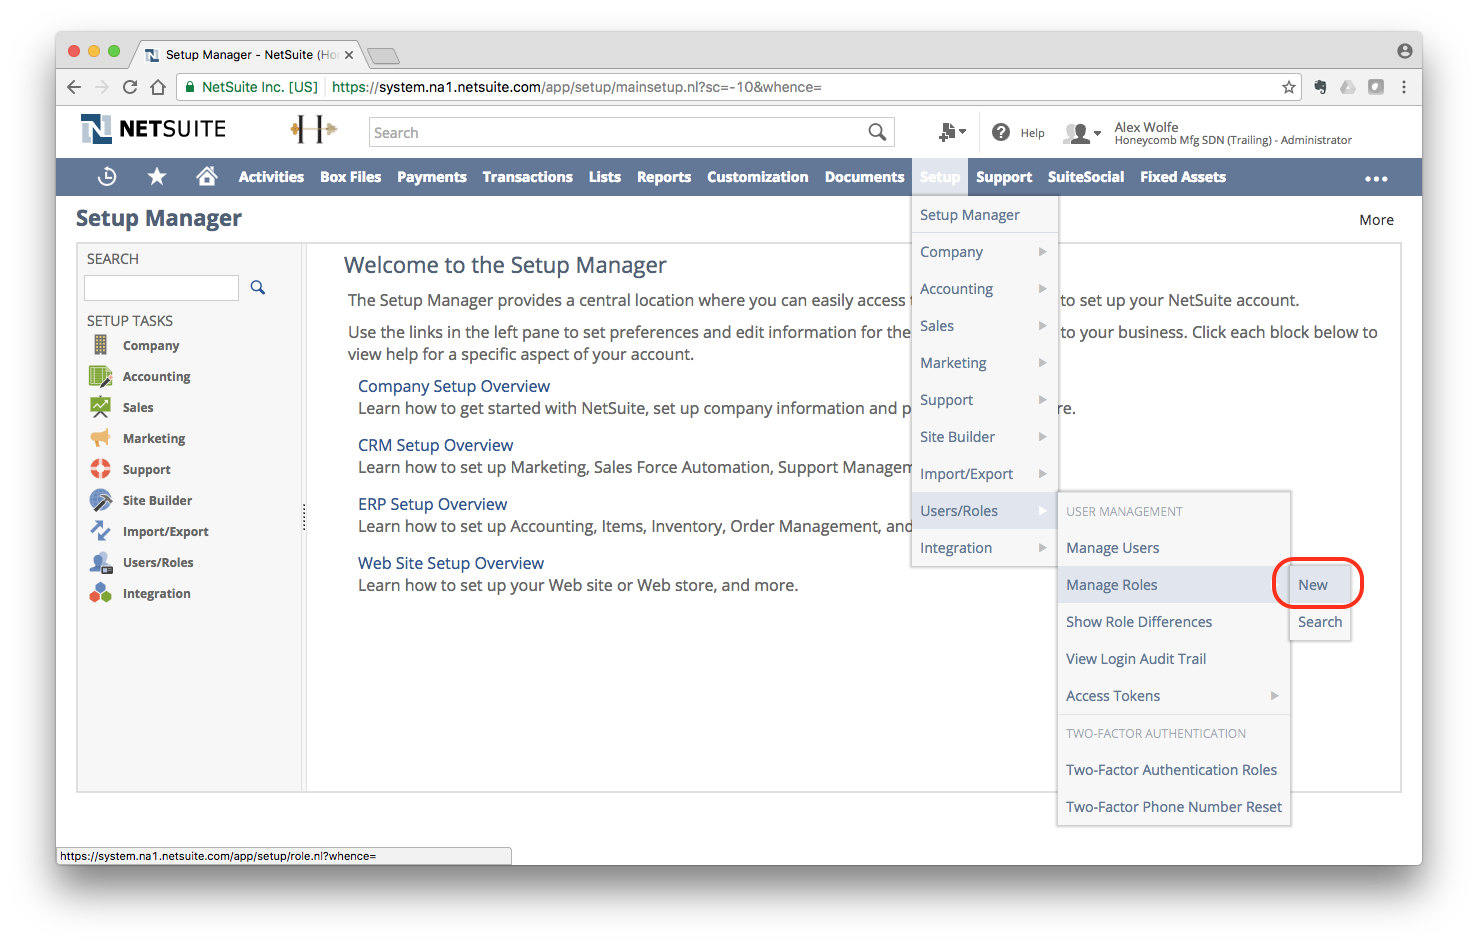
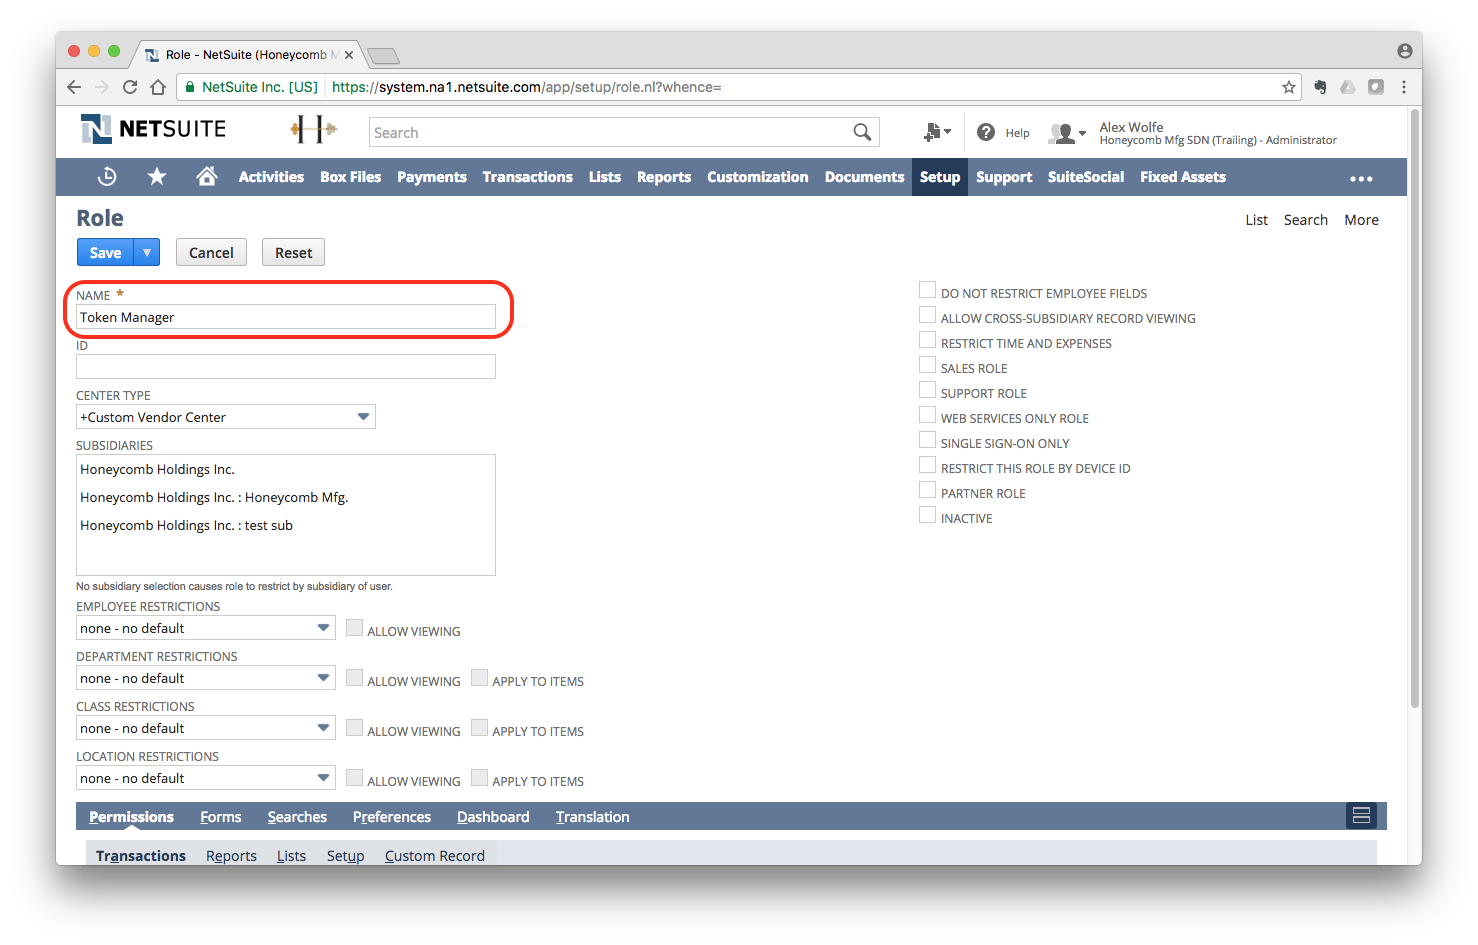
Step 3: Create a Token Role
- Click on Setup on the top navigation bar
- Under Setup, navigate to Users/Roles > Manage Roles > New
- Enter “Token Manager” as name of the new role
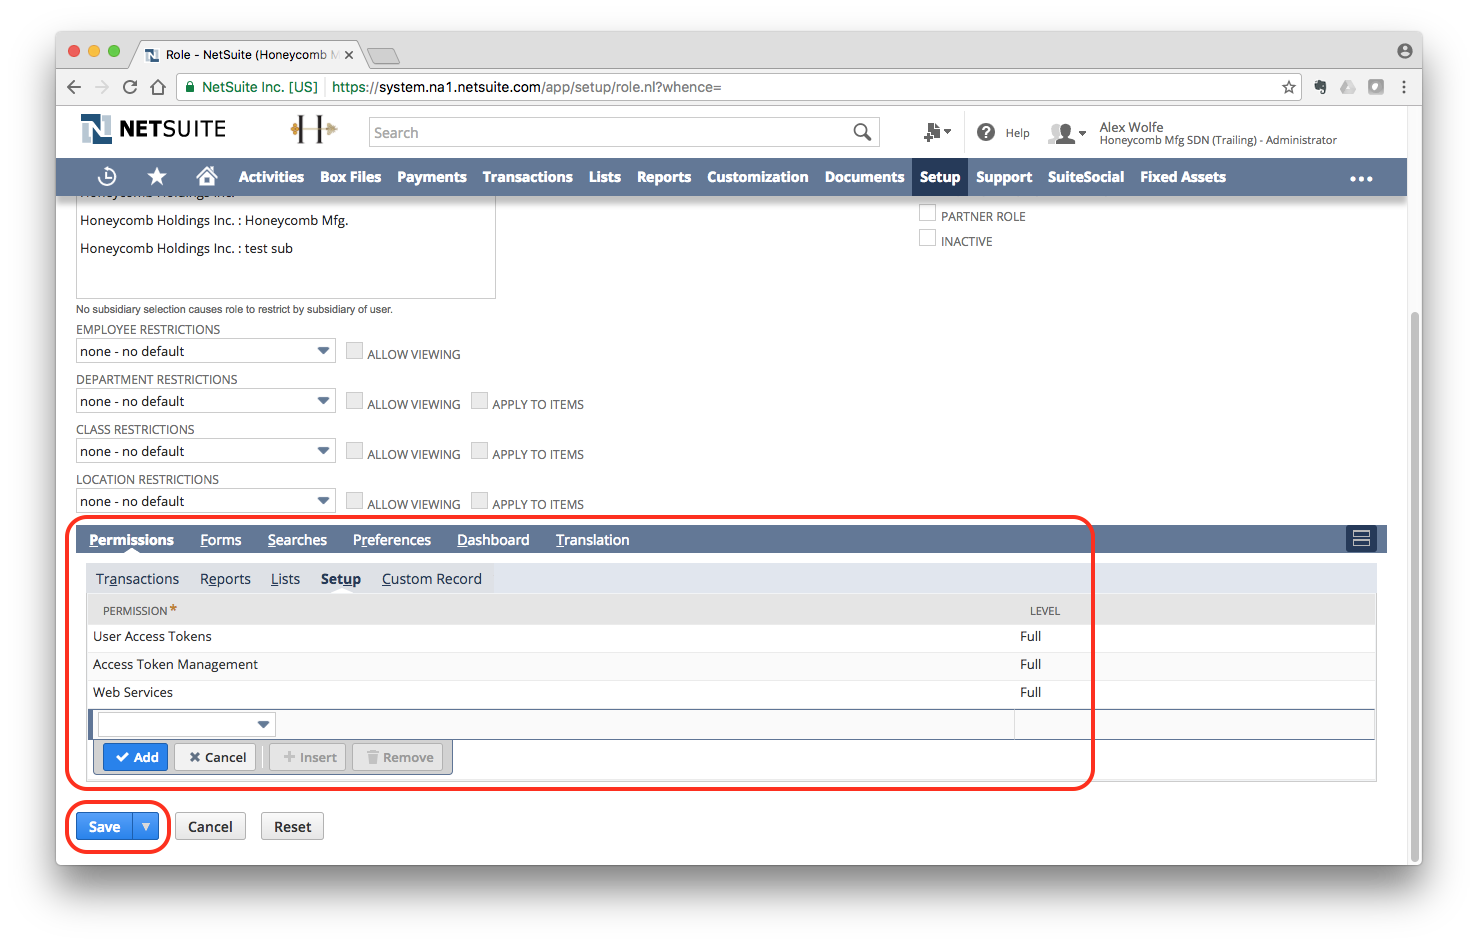
- Navigate down the page to Permissions > Setup and add the following permissions:
- User Access Token: Full
- Access Token Management: Full
- Web Services: Full
- Click Save
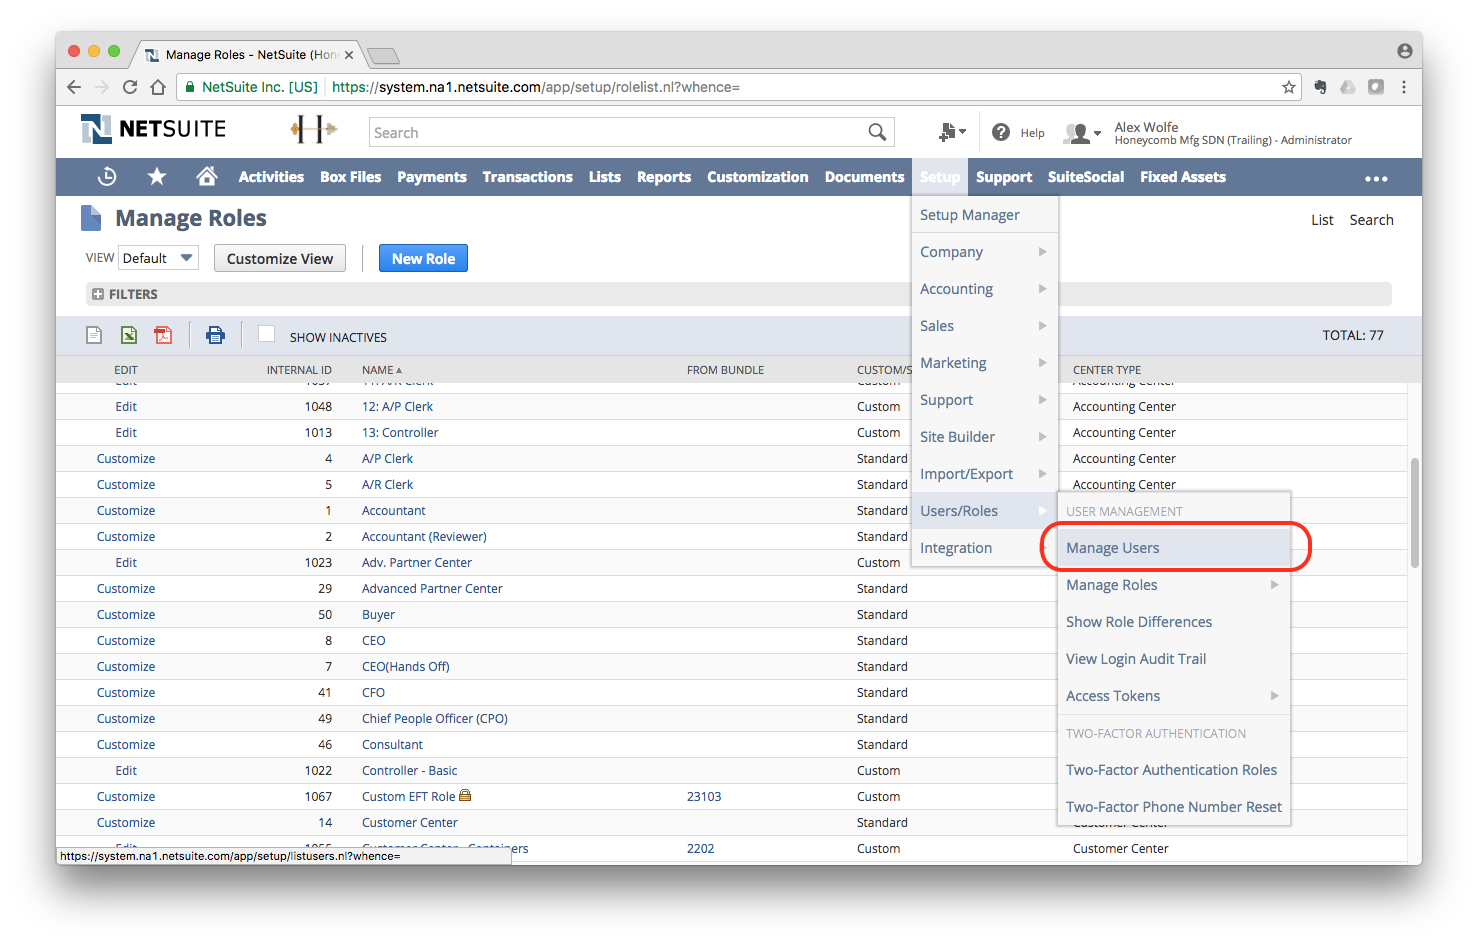
Step 4: Add Token Management Permissions
- Click on Setup on the top navigation bar
- Under Setup, navigate to Users/Roles > Manage Users
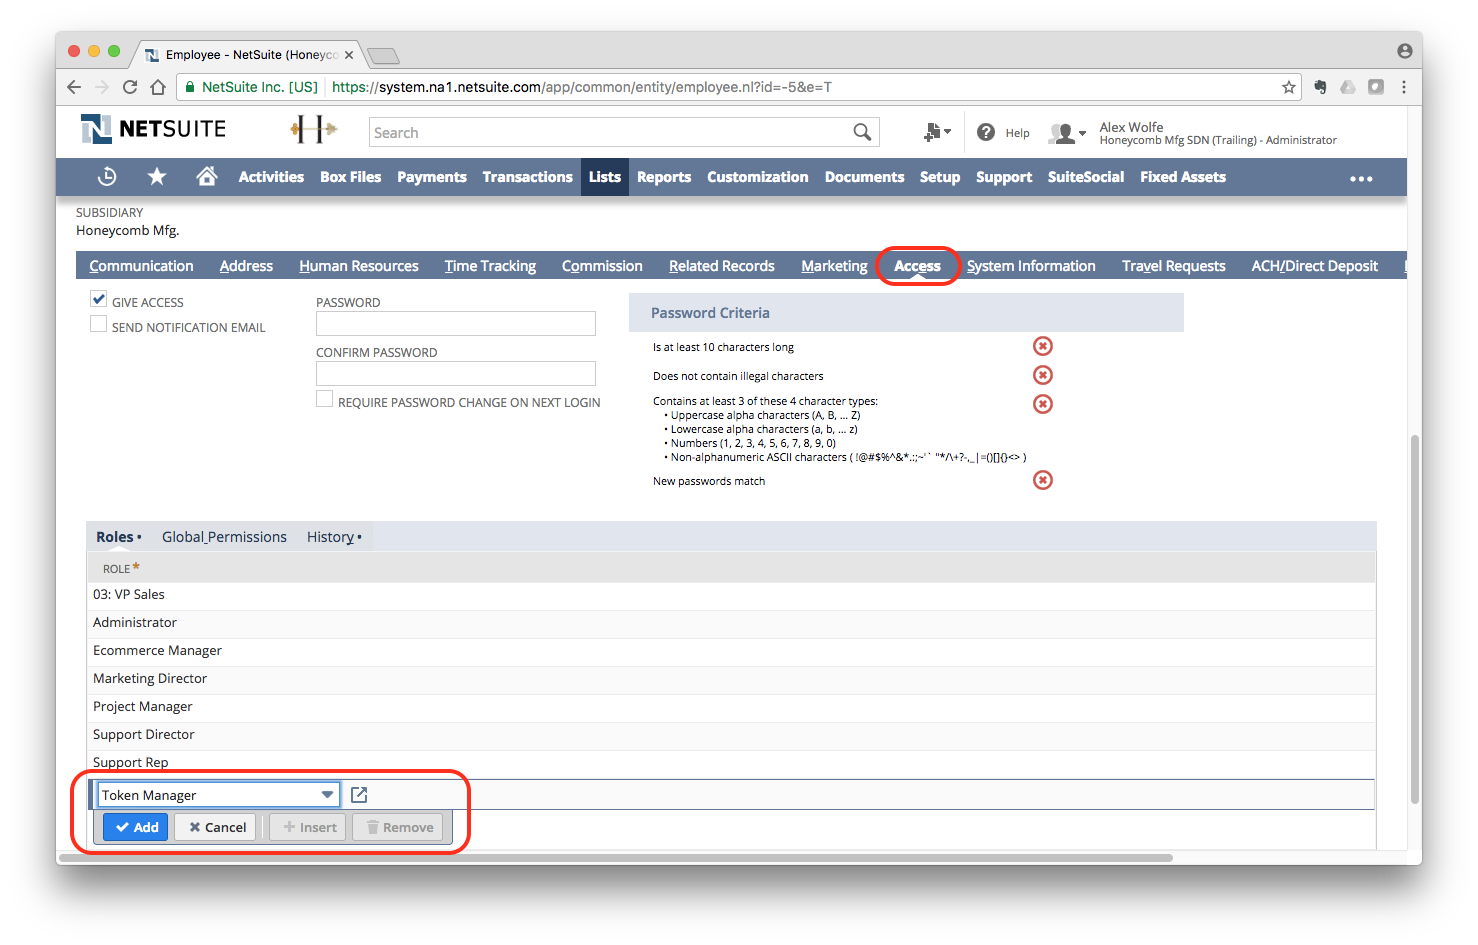
- Select your user
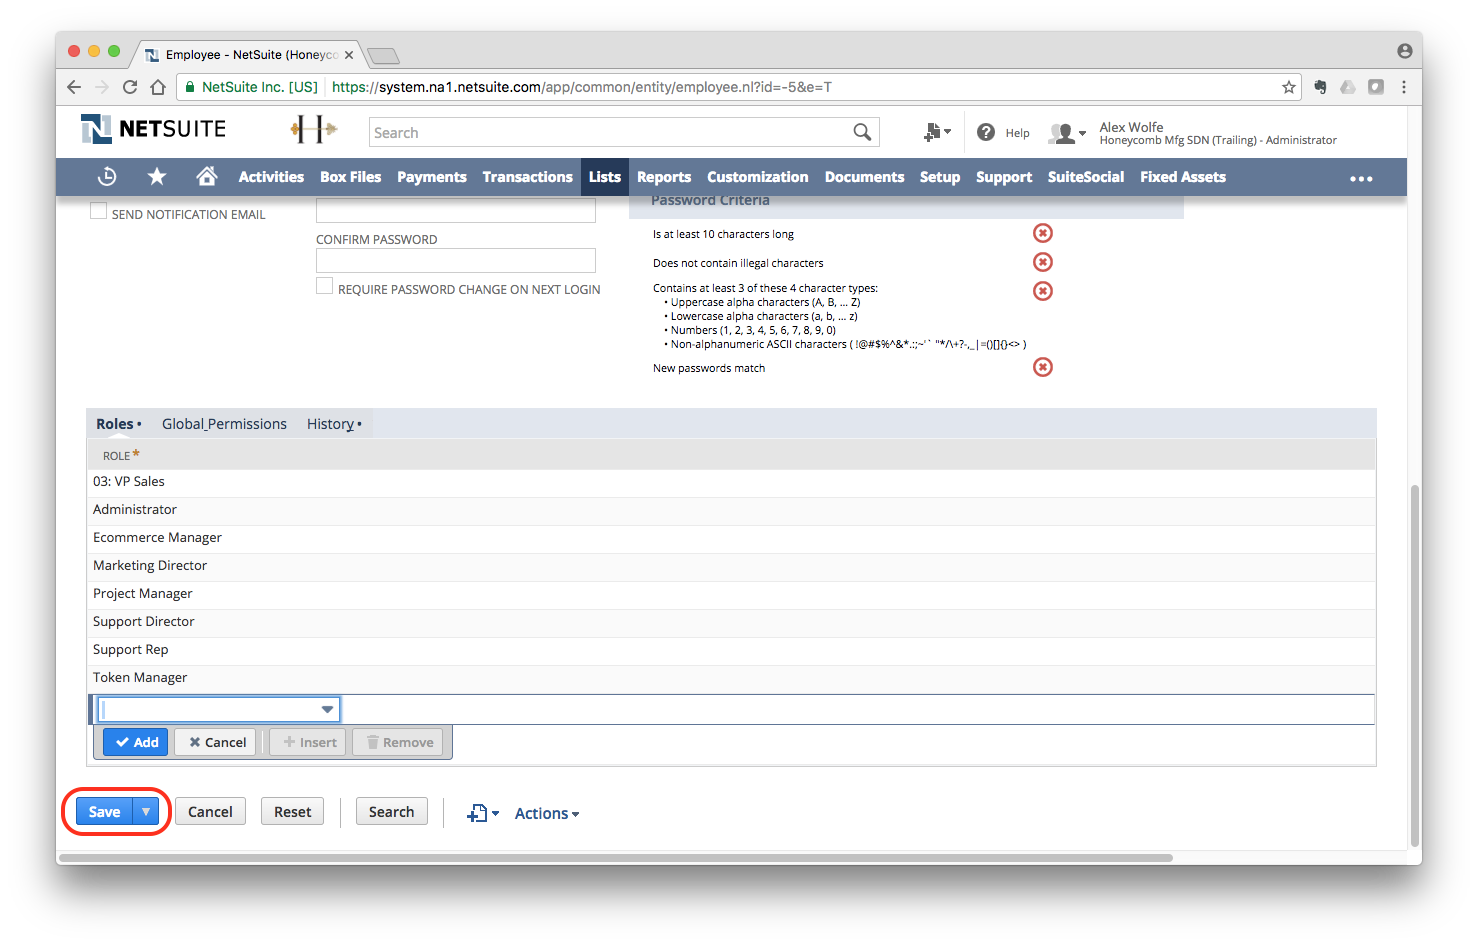
- Navigate down the page to Access > Roles and add the token role you just created (Token Manager)
- Click Save
Step 5: Enable View Permissions for Token Manager
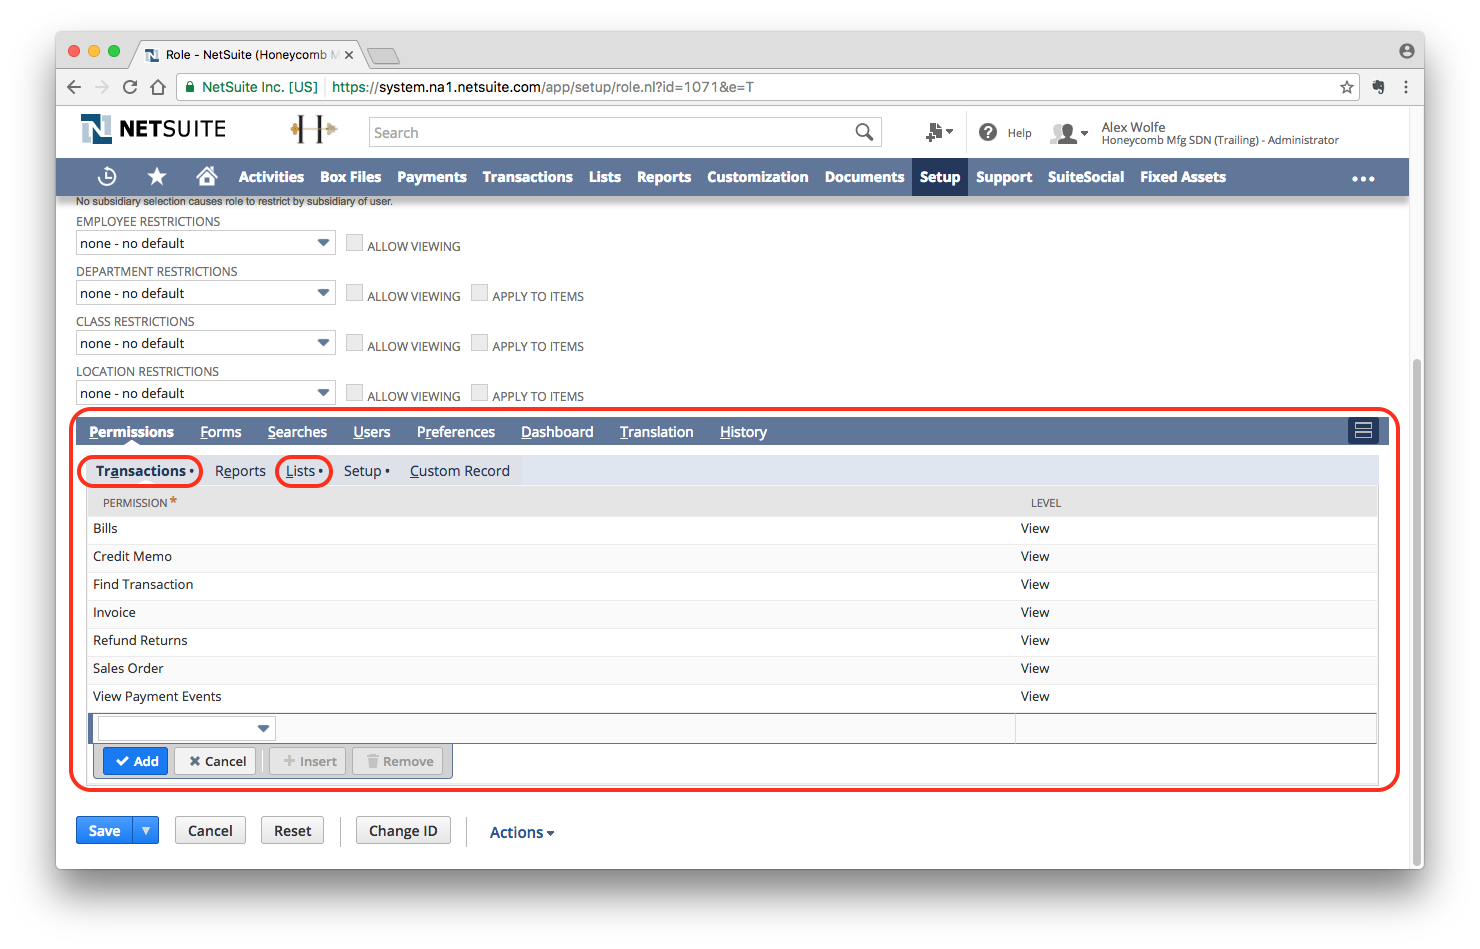
- Click on the new Token Manager role you just created
- Scroll down and ensure you enable the following View permissions:
Transactions:
Bills -> View
Credit Memo -> View
Find Transactions -> View
Invoice -> View
Refund Returns -> View
Sales Order -> View
View Payment Events -> View
Lists:
Customers -> View
Items -> View
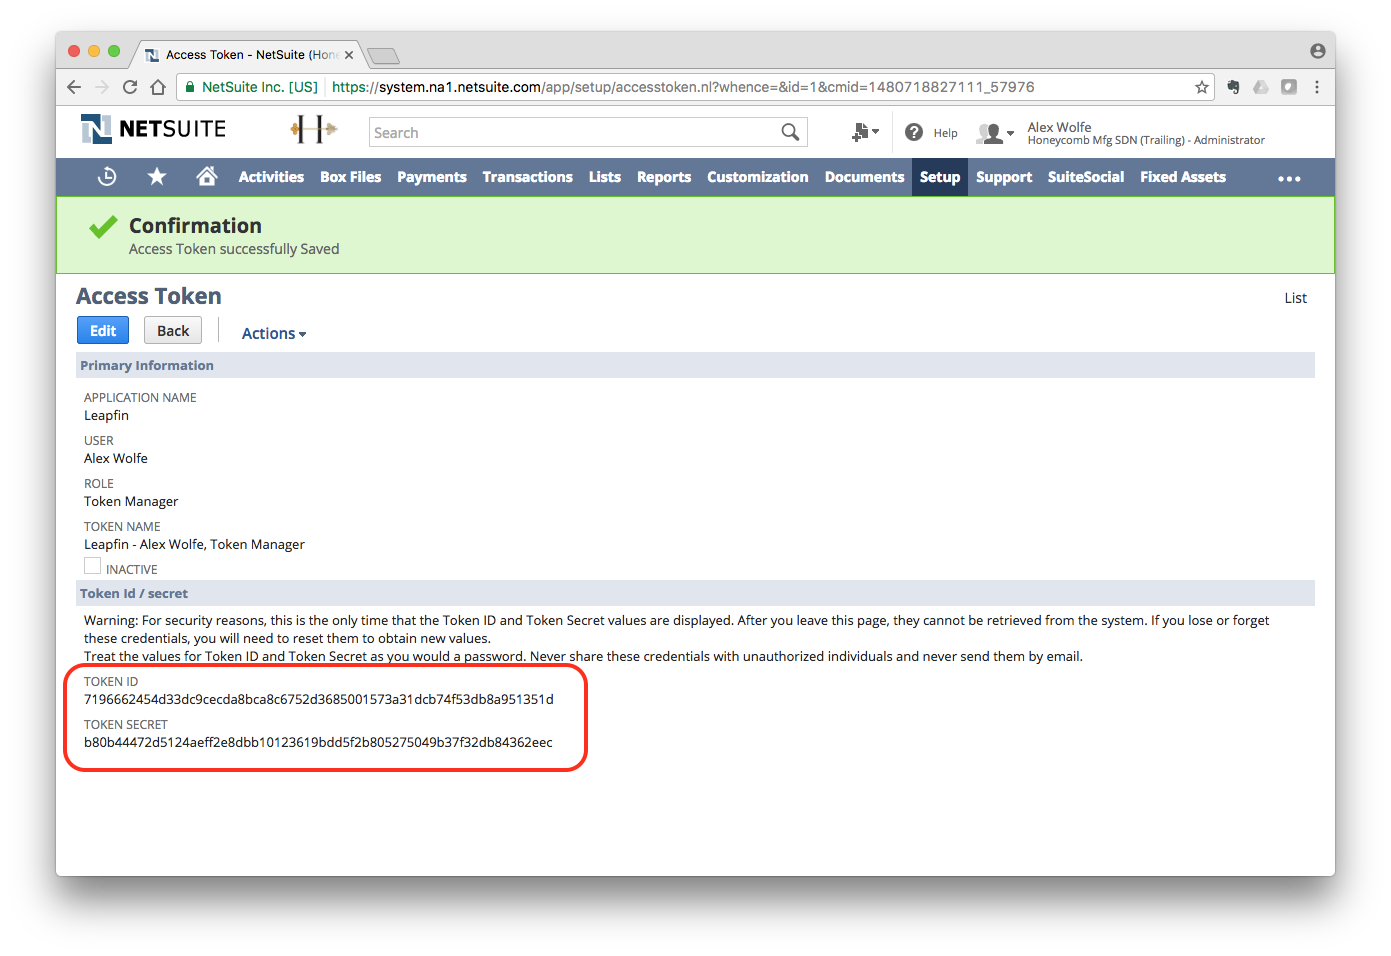
Step 6: Create Access Tokens
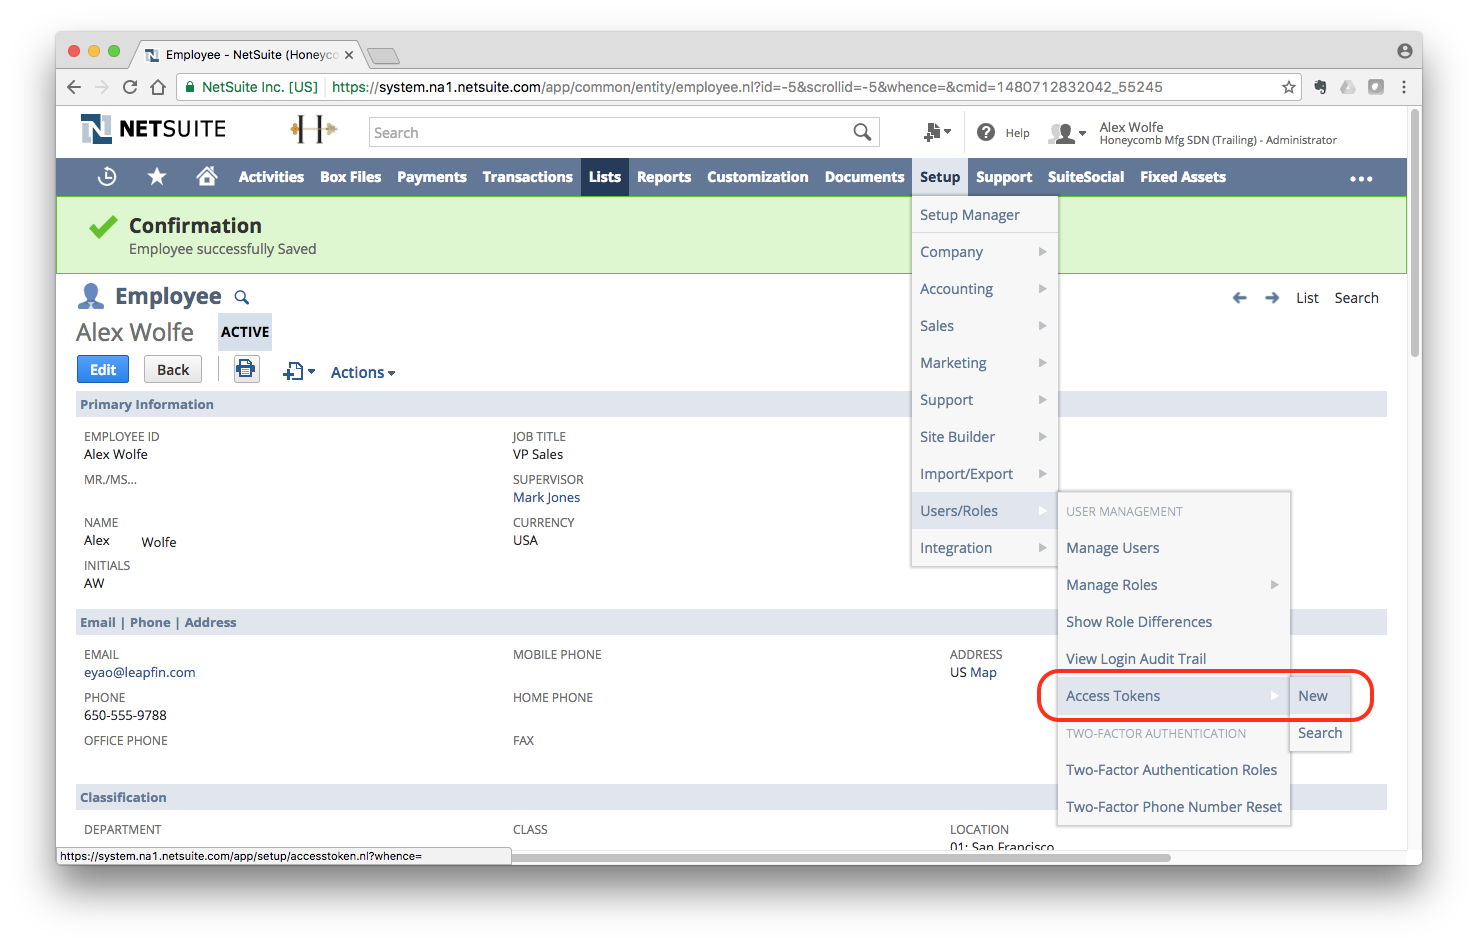
- Click on Setup on the top navigation bar
- Under Setup, navigate to Users/Roles > Access Tokens > New
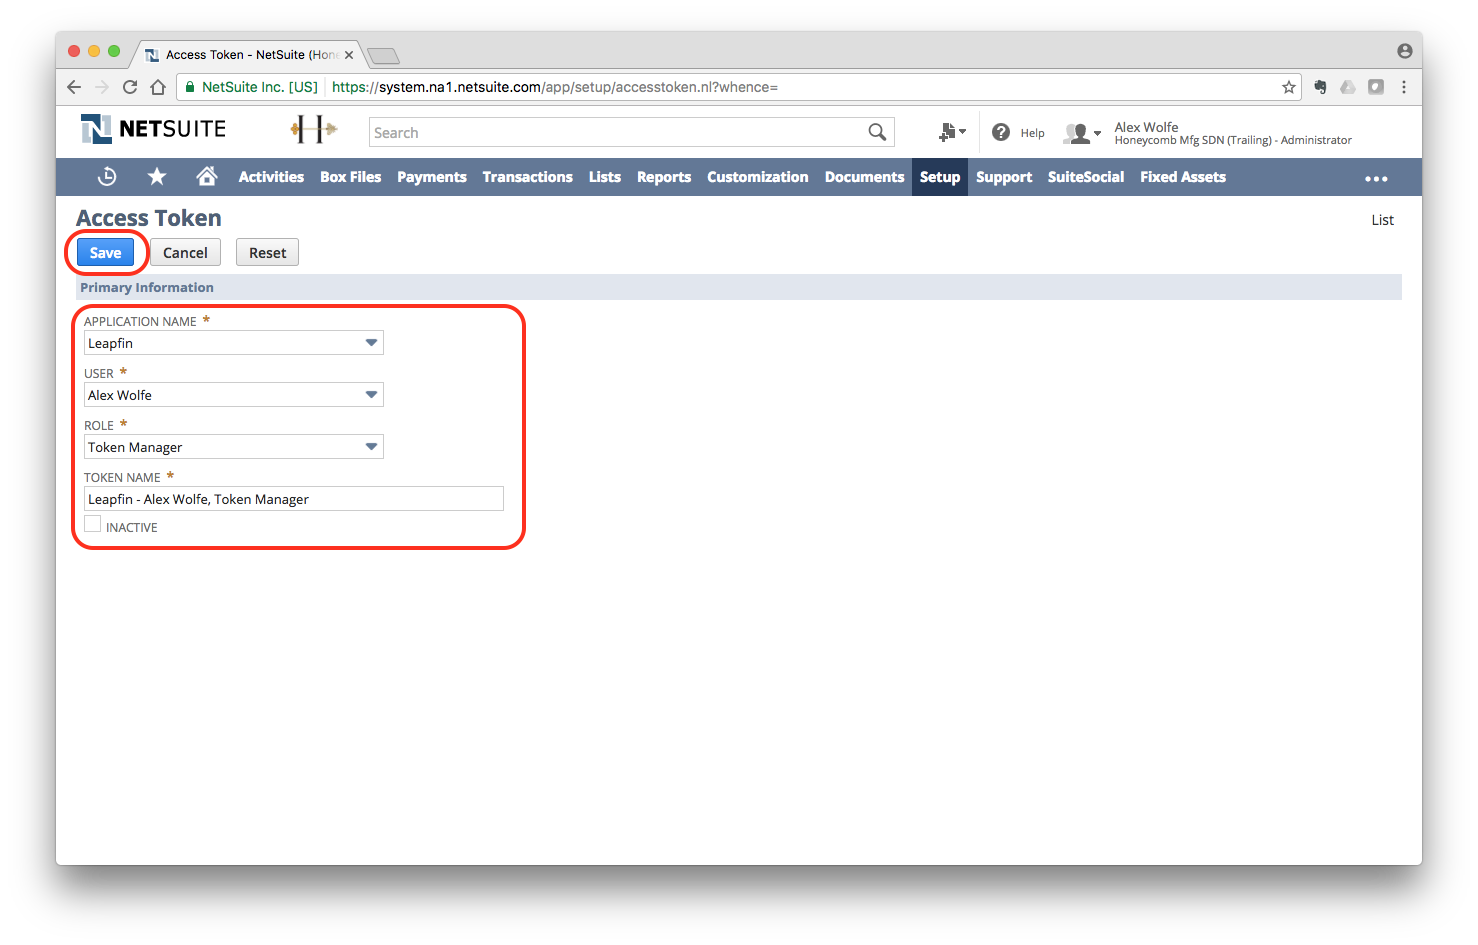
- Create a new token with the following settings:
- Application Name: Leapfin
- User: Select your user name
- Role: Select the new role your created (Token Manager)
- Click Save
- Capture the Token ID and Token Secret immediately! They only appear once!
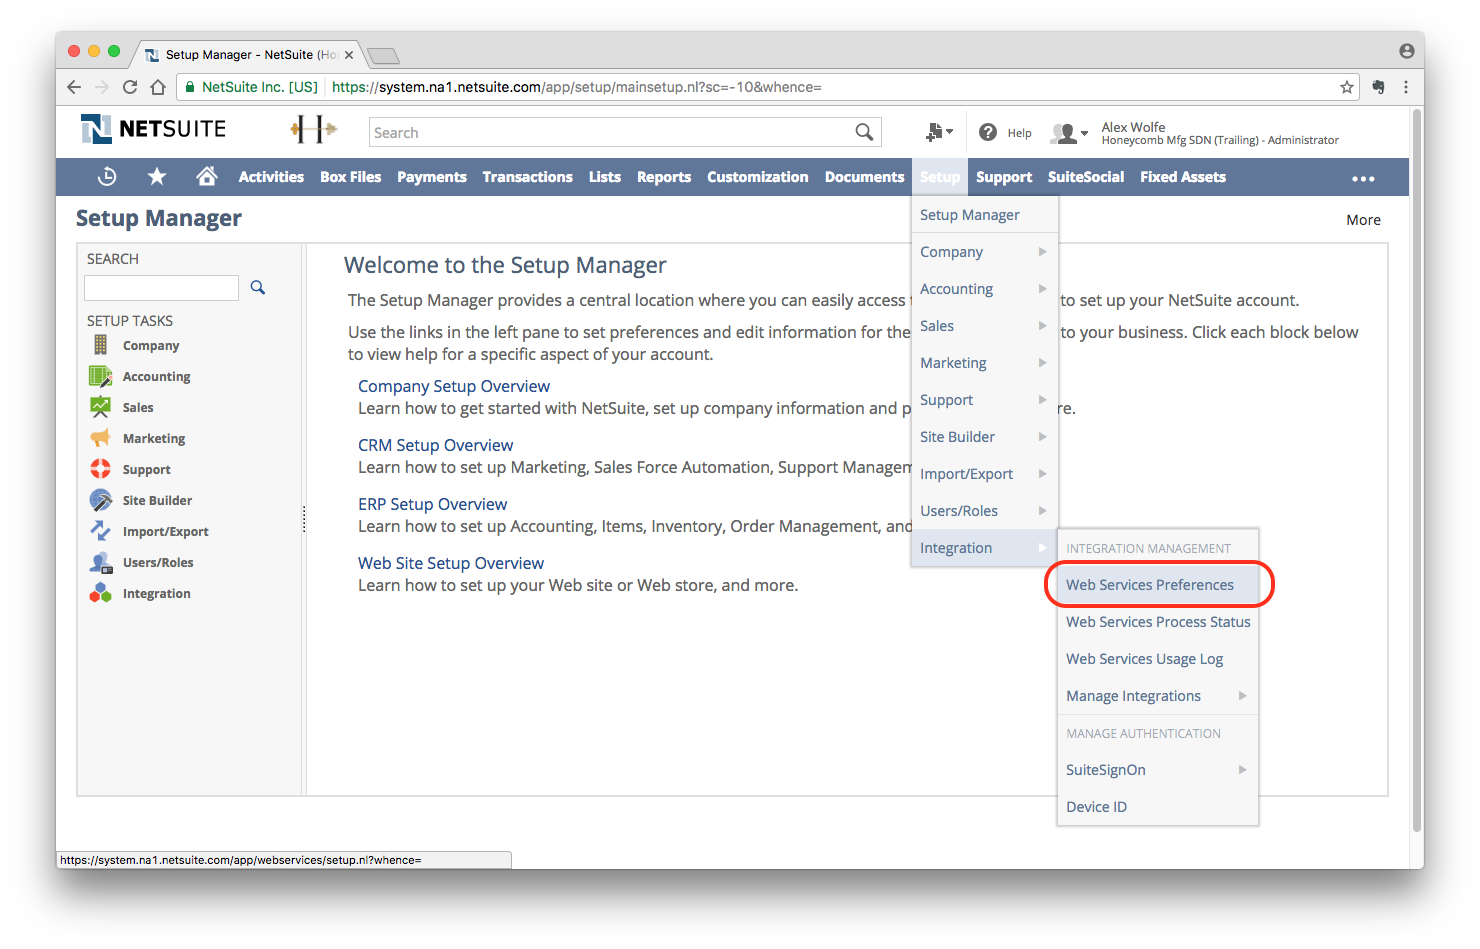
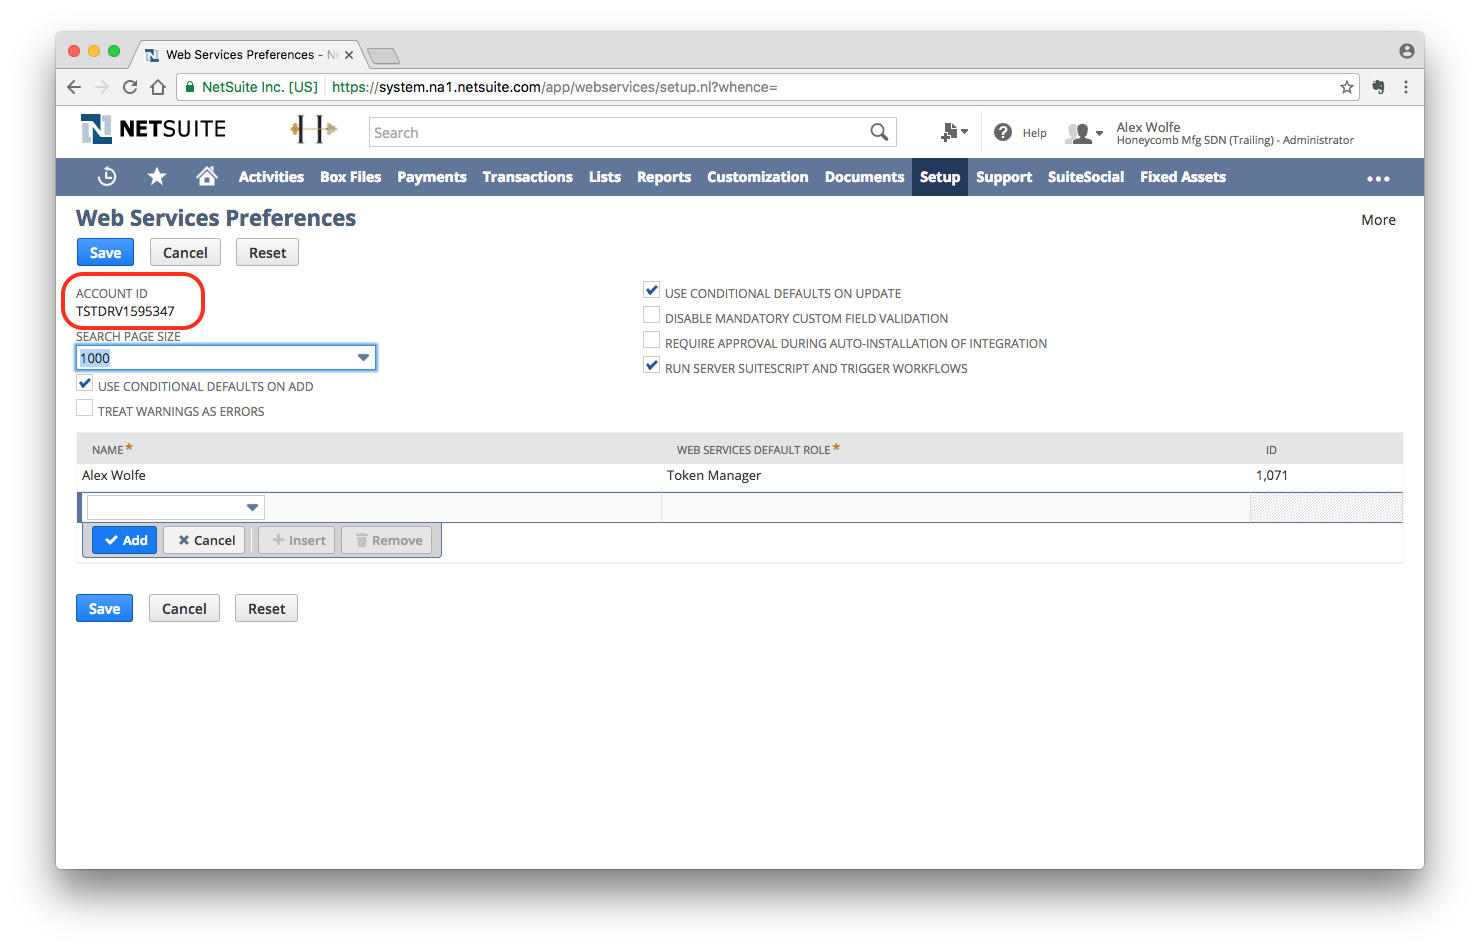
Step 7: Capture Account ID
- Click on Setup on the top navigation bar
- Under Setup, navigate to Integration > Web Services Preferences
- Capture Account ID on the top left of the screen